It was a big Make-All-theThings-Christmas over here. I went overboard which is so unlike me (said no one ever). The last couple years I’ve sewn a lot of things for the growing crowd of nieces and nephews. This year I’ve been doing more woodworking and did more along those lines for the kiddos. Although the last several weeks have been filled with panicked making of all the things – it has been good. Really good even. There’s something special about making things for your best people that you know they will love, not to mention some much needed home time and project therapy time when life is crazy. And it is certainly true that it is better to give than receive. Here’s a round up of the projects, complete with messy before and after pictures:
Craft Carts
Two of my nieces are very creative and crafty girls. They have a little craft ghetto in their unfinished basement and I asked their dad to send me a picture of their work areas to inspire me. The craft-splosion photos made me all mushy inside, remembering the weeks my sister and I would set up our rickety folding table next to the furnace in the basement, huddled over glue guns in the dimly lit room creating Christmas magic for our friends and family. It also just made me happy they have that spot to be creative. We creative types need that. And it inspired me to make craft carts for them. I took a used kitchen cabinet, added casters, painted it, added a planked top, and a pegboard on the back so they’ve got a spot to hang all their tools. It was a stash busting project in that I could pass on some cabinets that weren’t needed for their original purpose. Ten year old me would have been thrilled and it didn’t disappoint – the girls loved them and I imagine they will be put to good use for years to come.


Magnetic Chalkboard
This one might be my favorite. I saw various tutorials and then kind of winged it. 1 x 3’s for the frame, kreg jigged pocket holes and wood glue to connect them, I stained the frame, made chalkboard paint out of clearance black paint and unsanded grout, and D ring hangers on the back. I might have to make one for myself. (In case you try this at home, I used a sheet of metal found in the plumbing aisle – rather than the triple the price sheet metal found otherwise.)


Desk
This was a fun project. I bought this little desk a dozen years ago at a furniture sale at the school my mom attended as a kid. I went with my aunts and we all found some fun little pieces. I used this desk for several years at my old house but I don’t have a use for it at the new place. I sanded down the old crusty paint job and decided the original desktop wasn’t good enough to keep. So I made a new planked top out of 2×12’s I had in the barn. I used the kreg jig to make pocket holes to connect the two pieces and then stained it. The 2×12’s weren’t perfect but they add to the rustic charm. I painted the bottom (same chalk paint I had made for the chalkboard) and then finished it with poly.


Doll high chair
Thrift store find originally. Came looking a little rough and needing some love but I loved the pretty wood scallops and knew I could rescue it (duh). I glued and nailed a few loose joints, added a tray, and painted it. I think it came out adorable. My two year old niece loved it and reported that her baby said “I like it” and “thank you.”


Bench
I used an old twin bed head board and foot board to build a bench for two small nieces. I used deck boards from my stash to build this bench and was really happy with how it turned out. I sprayed it with my Critter sprayer using outdoor paint, home mixed for a custom blue. One of the girlies who received it was thrilled, the other informed me she doesn’t like sharing and would like me to build her a doll high chair instead. Hopefully she will enjoy it in the future. I want to make one for my house now, of course.


Water Towers
My two year old nephew is a super engineer nerd in the making. I’m so proud. On the way to a family wedding this spring I explained to him about water towers and how they create a pressurized system. That was an innocent beginning to a full blown obsession. This kid loves his water towers. He regularly watches youtube videos of water tower demolition and likes to play demolition. He was using a counter height stool the other day to demolish. Naturally, he isn’t terribly careful and he makes me nervous knocking down that big stool in close proximity to his little brother. There must be something we can make!! This was a last minute addition to #makeallthethingsChristmas but turned out so great! My sister traced water towers on some 2×6″ scraps. We cut them on my dad’s bandsaw and then my dad insisted on routing the edges (I get my whole ass tendencies from someone). Far from perfect but just the thing for this small water tower enthusiast. We painted them to match some local water towers that CK loves and had just enough time for the paint to dry before we wrapped them and headed out the door.


Youth Chair
I found this youth chair at a garage sale this summer. The prices was low and some of the joints were wobbly. I pulled the wobbly joints apart, cleaned them out, and reglued and added a few screws. Spray painted it to make it look like a whole new chair. Since his baby brother needs the high chair, this chair will certainly be put to good use immediately.


Blanket
I made my Hobbit baby nephew a blanket. Typically I try to make a blanket when a baby arrives but I was six months late on this one. I used a quilting cotton on one side and a super soft fuzzy fabric on the back. Very cozy.

Jedi Robe
There I was, doing lots of wood working type projects for a bunch of the kids, but I couldn’t figure out what to do for 7 year old Andrew. So I figured I couldn’t go wrong with a Jedi robe. I’ve made a few of these in past years for other people and they are usually a big hit. Not to mention that any kind of snuggly wearable blanket seems like a great idea, right? I was just slightly nervous he’d think he got left out of the big impressive gift bandwagon. No worries! Even too big for him, he loved it! Wore it that day for the remainder of the party and wore it back again the next day for the next party. Glad he’s enjoying it! He also discovered how much faster he can get down the slide at my parent’s house in a jedi robe. You can make it practically to the wall!

There it is! The #makeallthethingsChristmas round up. I’m glad I did it but I make no promises for how next year will look.


 It’s that time of year again… the black raspberries are ripe. This spring I was busy tearing apart the house so I didn’t get out there to cut down the invasive species surrounding the raspberry jungle. It is bad out there right now. Nettles. Poison ivy. Buckthorn. Russian olive. Lots of other weeds. (Does anyone else hear how necessary goats are out here??) But… those little black juicy morsels make it worth braving the jungle for. They started ripening last week. I’ve only done a bit of peripheral picking and introduced a couple cute nephews to the magic of black raspberries. The Hobbit couldn’t cram them into his mouth fast enough.


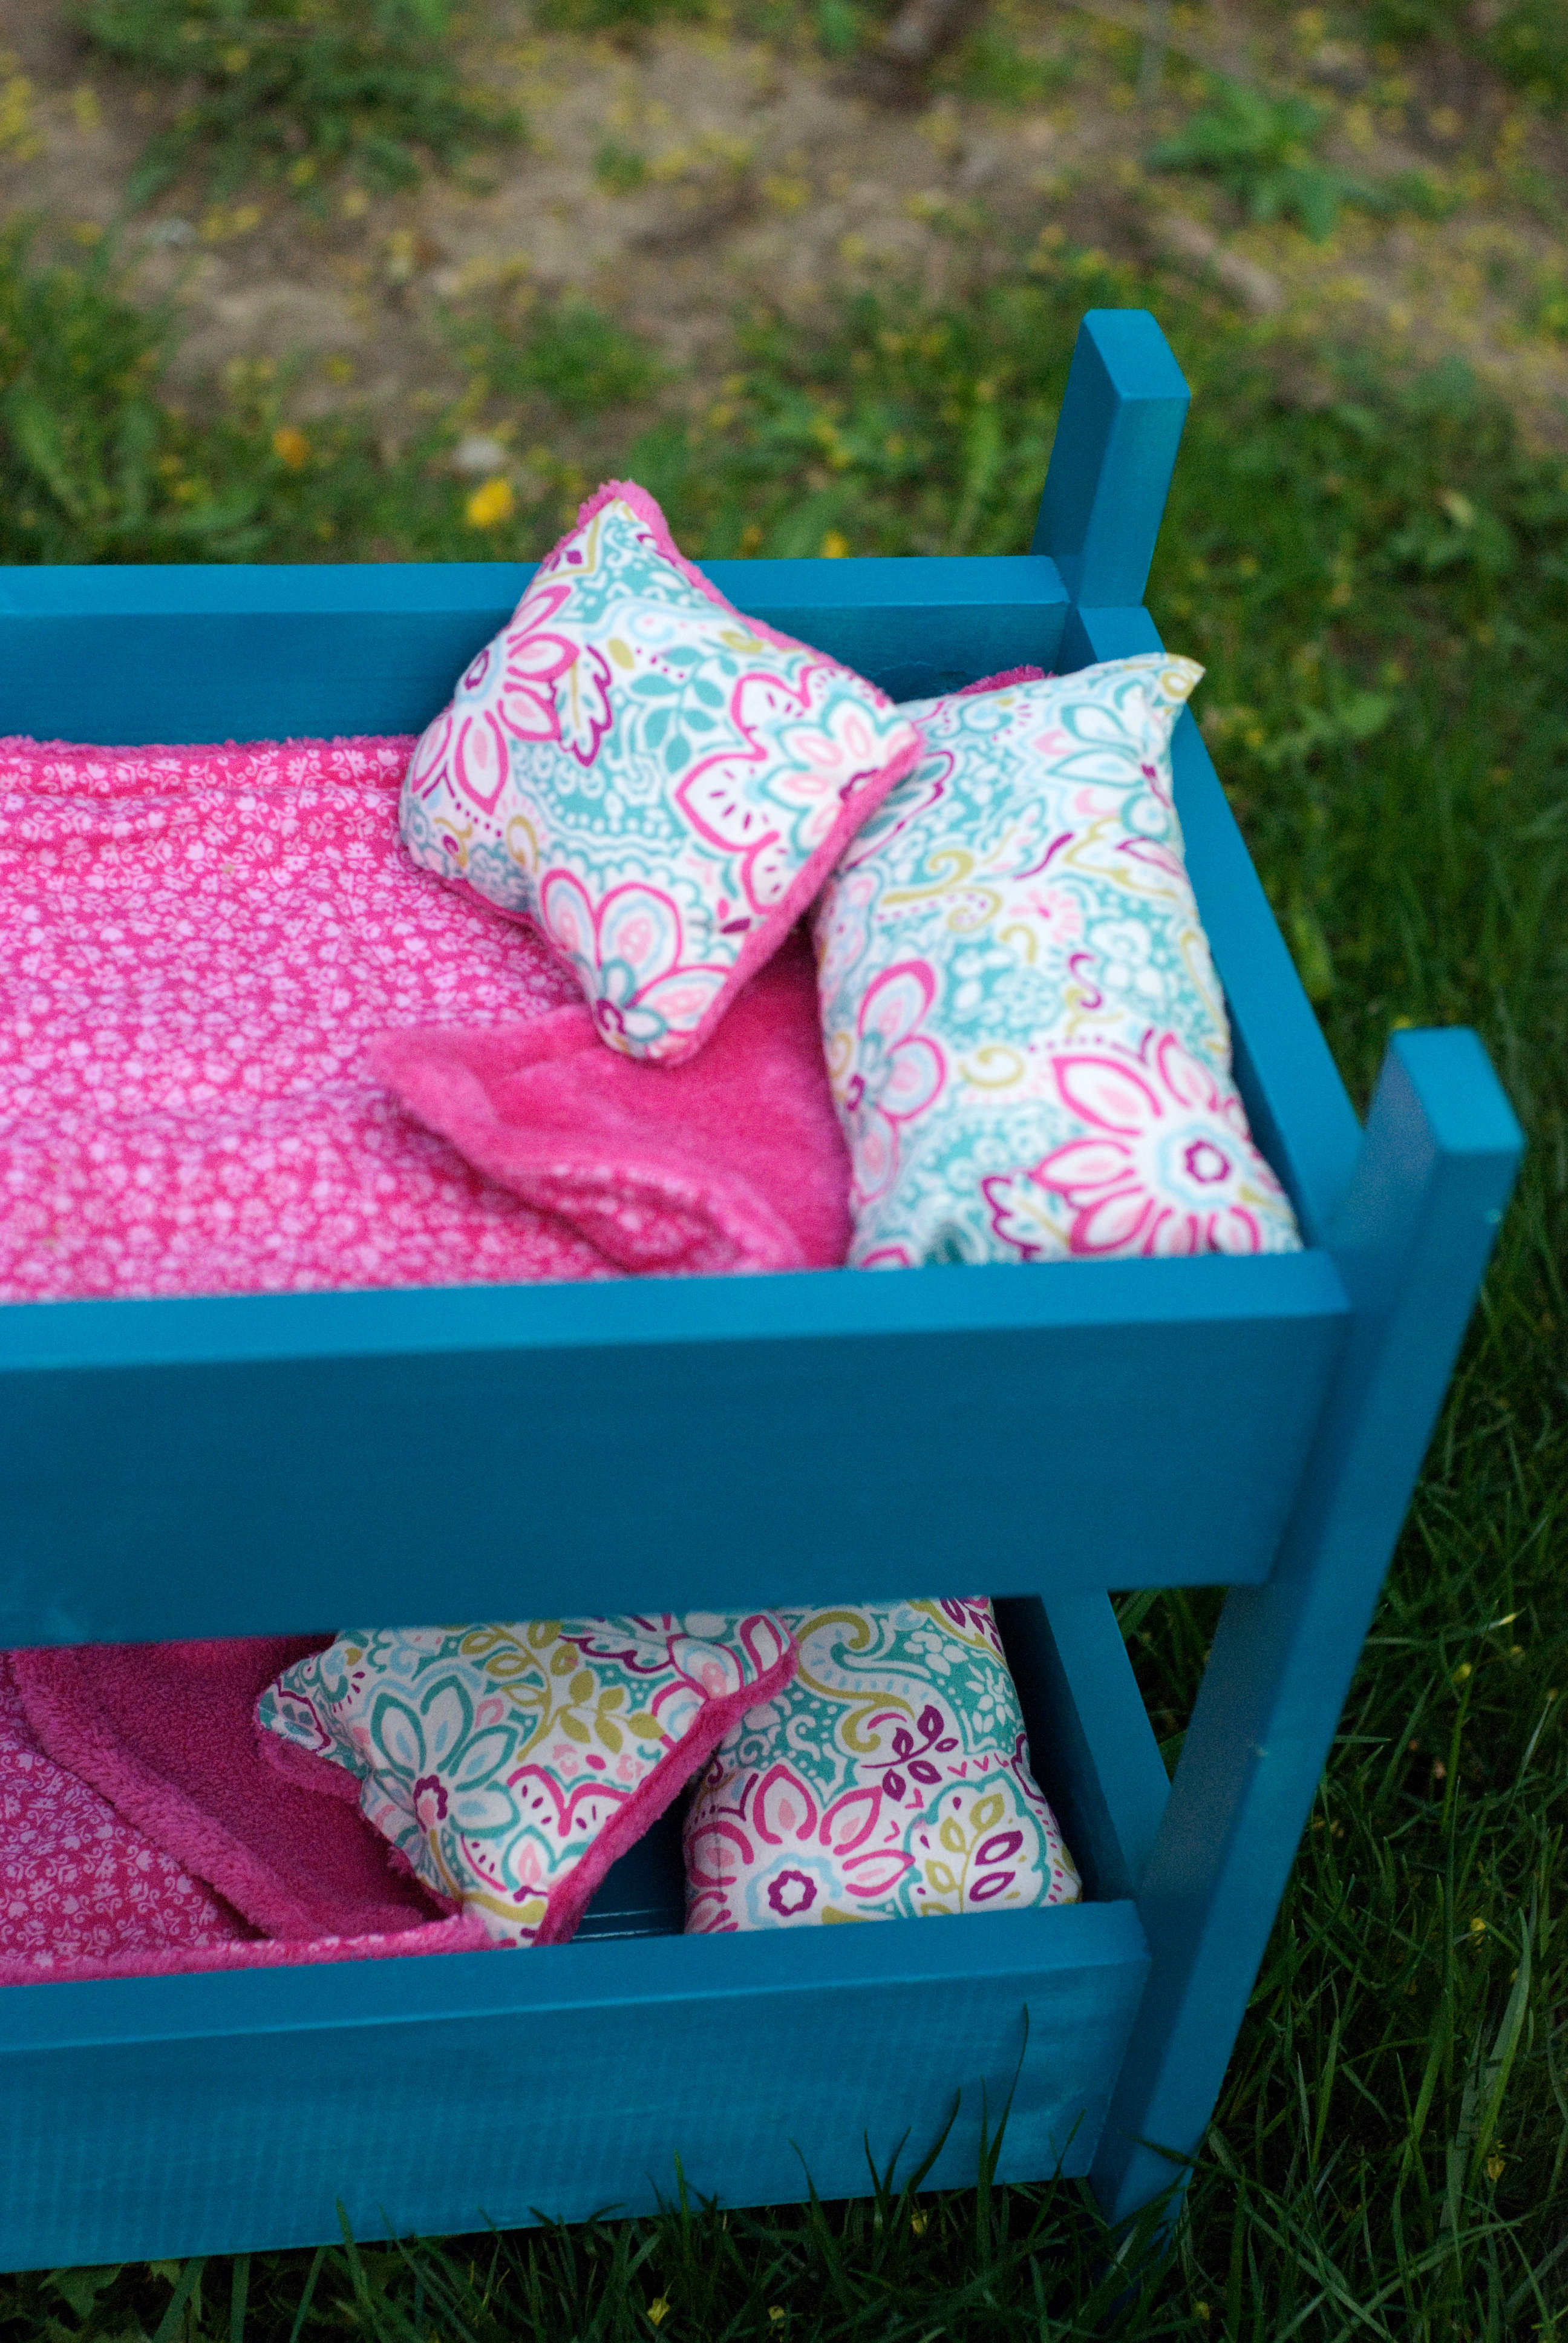
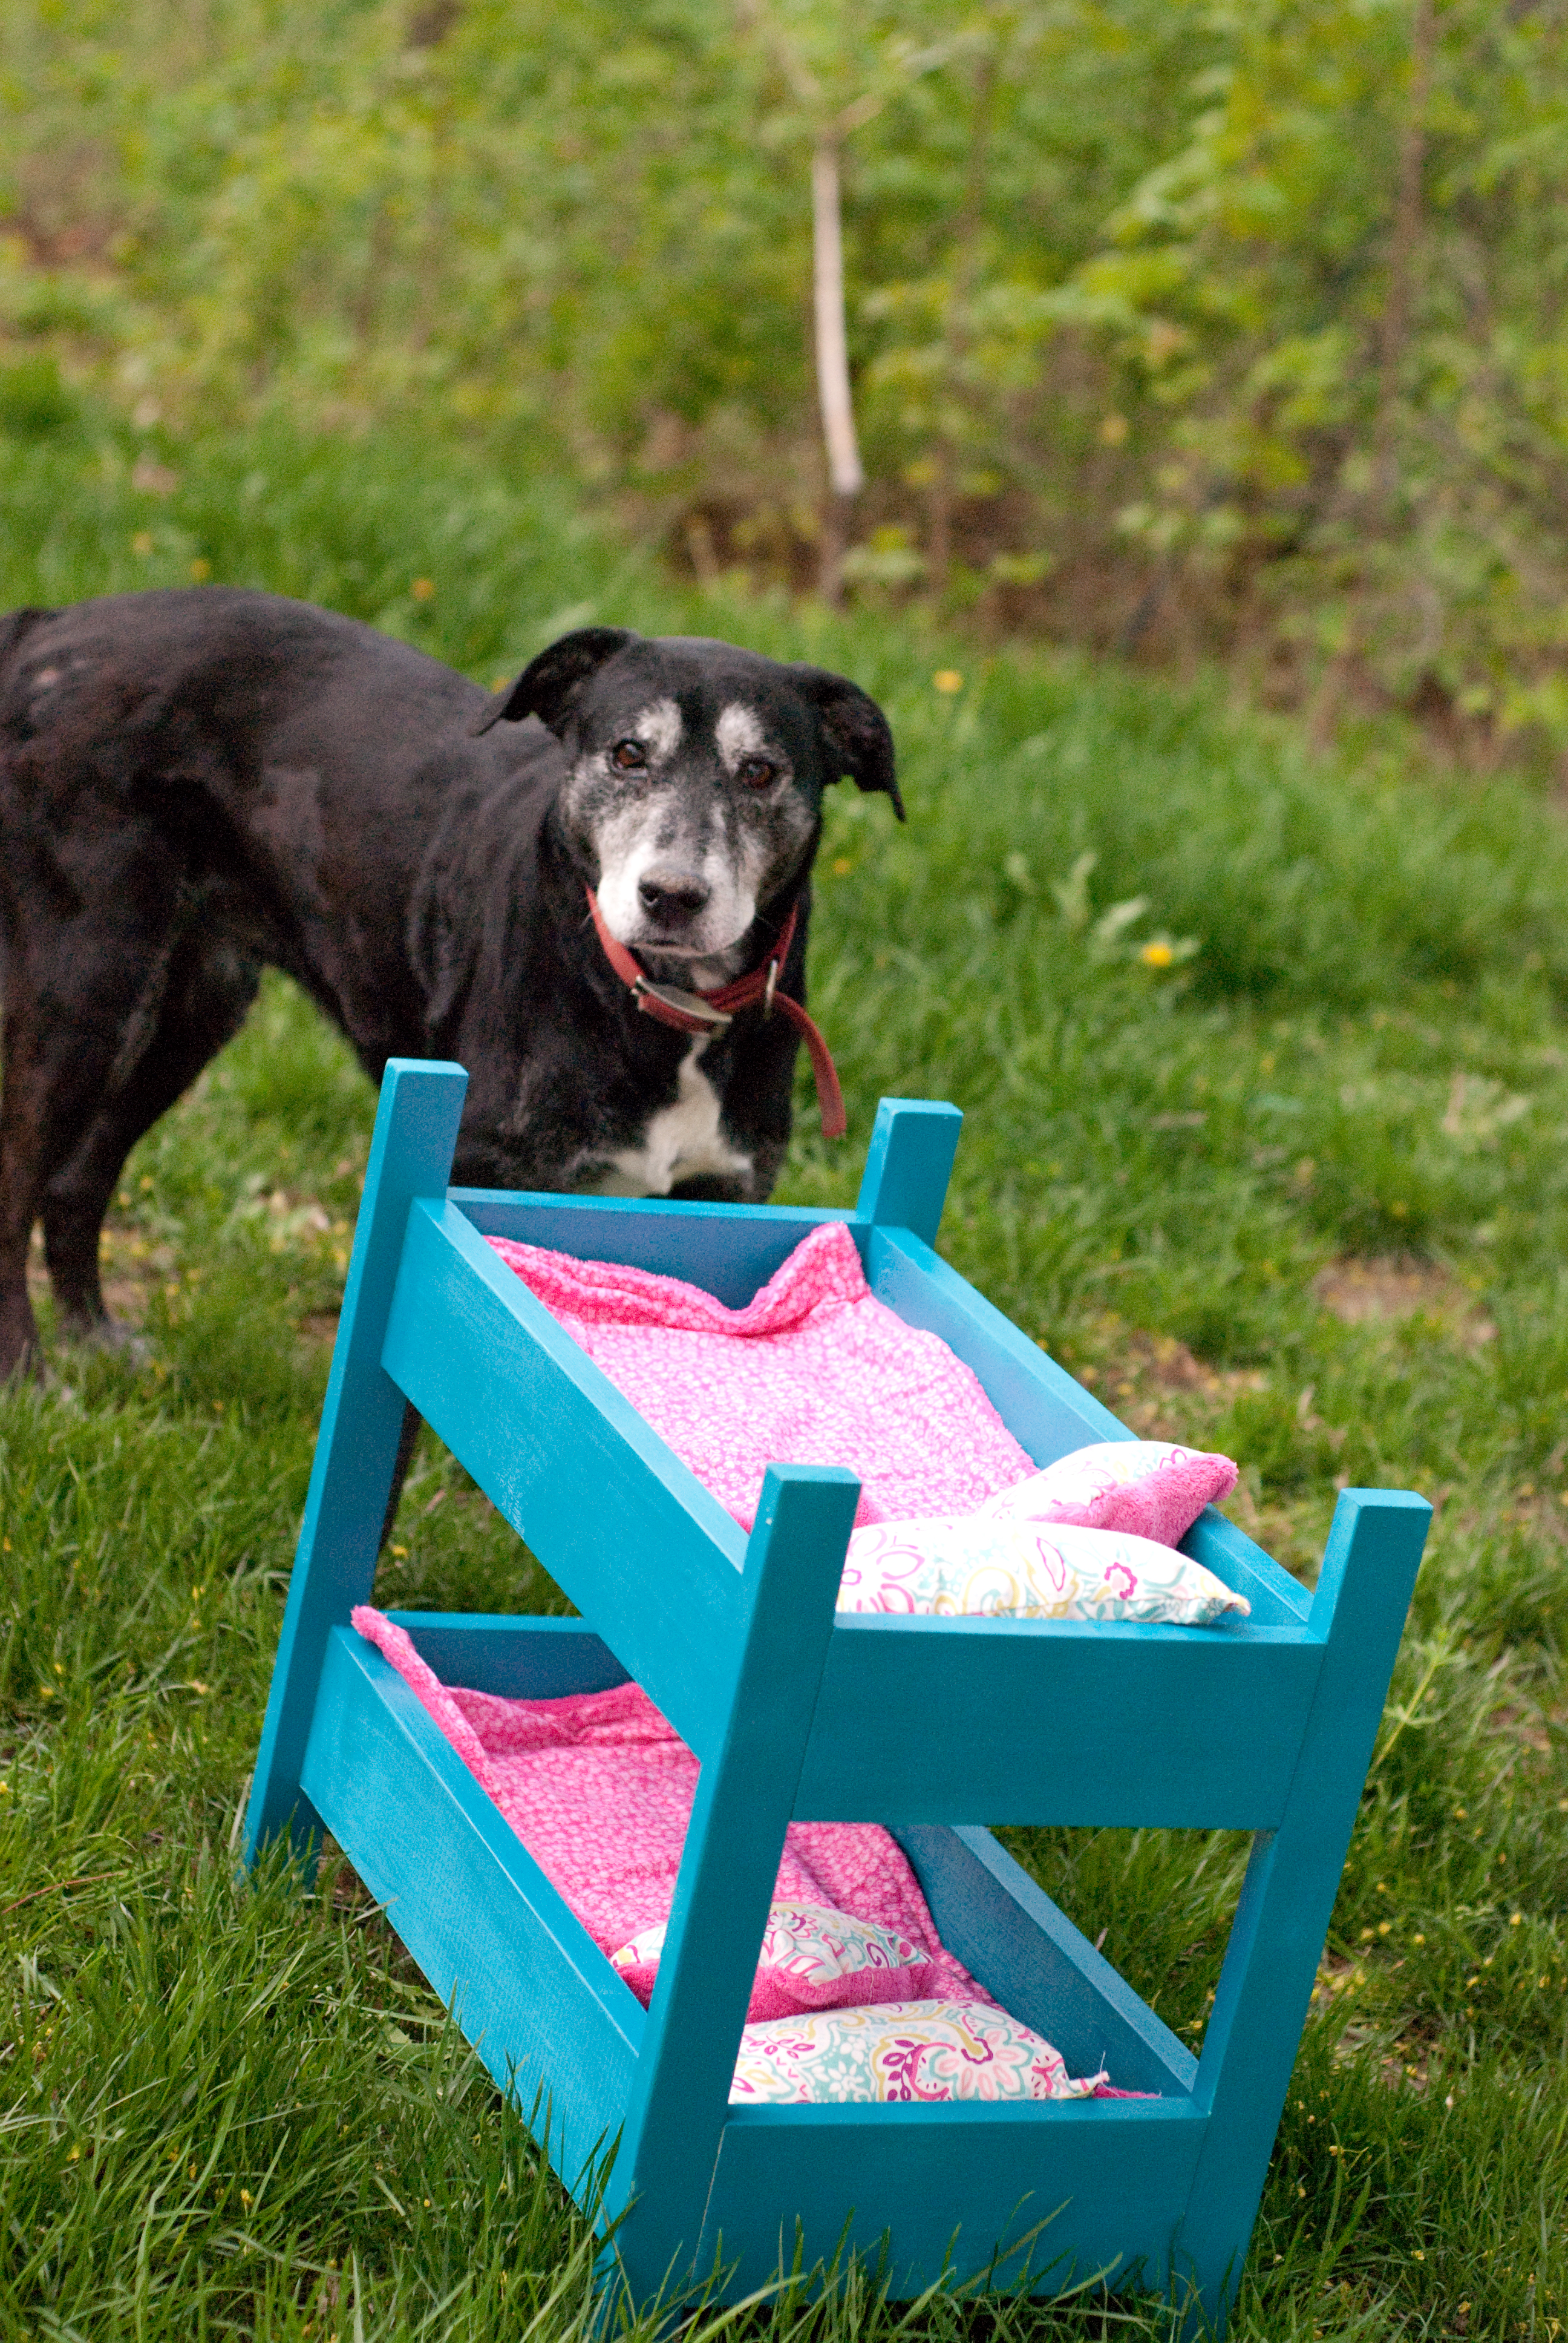
 In today’s episode of #makeallthethings, I have a really cute niece turning 3 today. Gloria is a darling girl with a great sense of humor, gorgeous red curly hair and an imp face, and she is a girl who loves her babies. For Christmas I gave her a made over doll high chair, which she uses regularly. For her birthday, I suggested to her sisters that we make a doll bunk bed for her. Jane and I sewed the bedding a couple weeks ago while Lucy worked on her teepee and kept Daisy distracted while ignoring us entirely (and believe me, I get it). Then this week arrived and with only a few days to spare, I figured I should get this thing built.
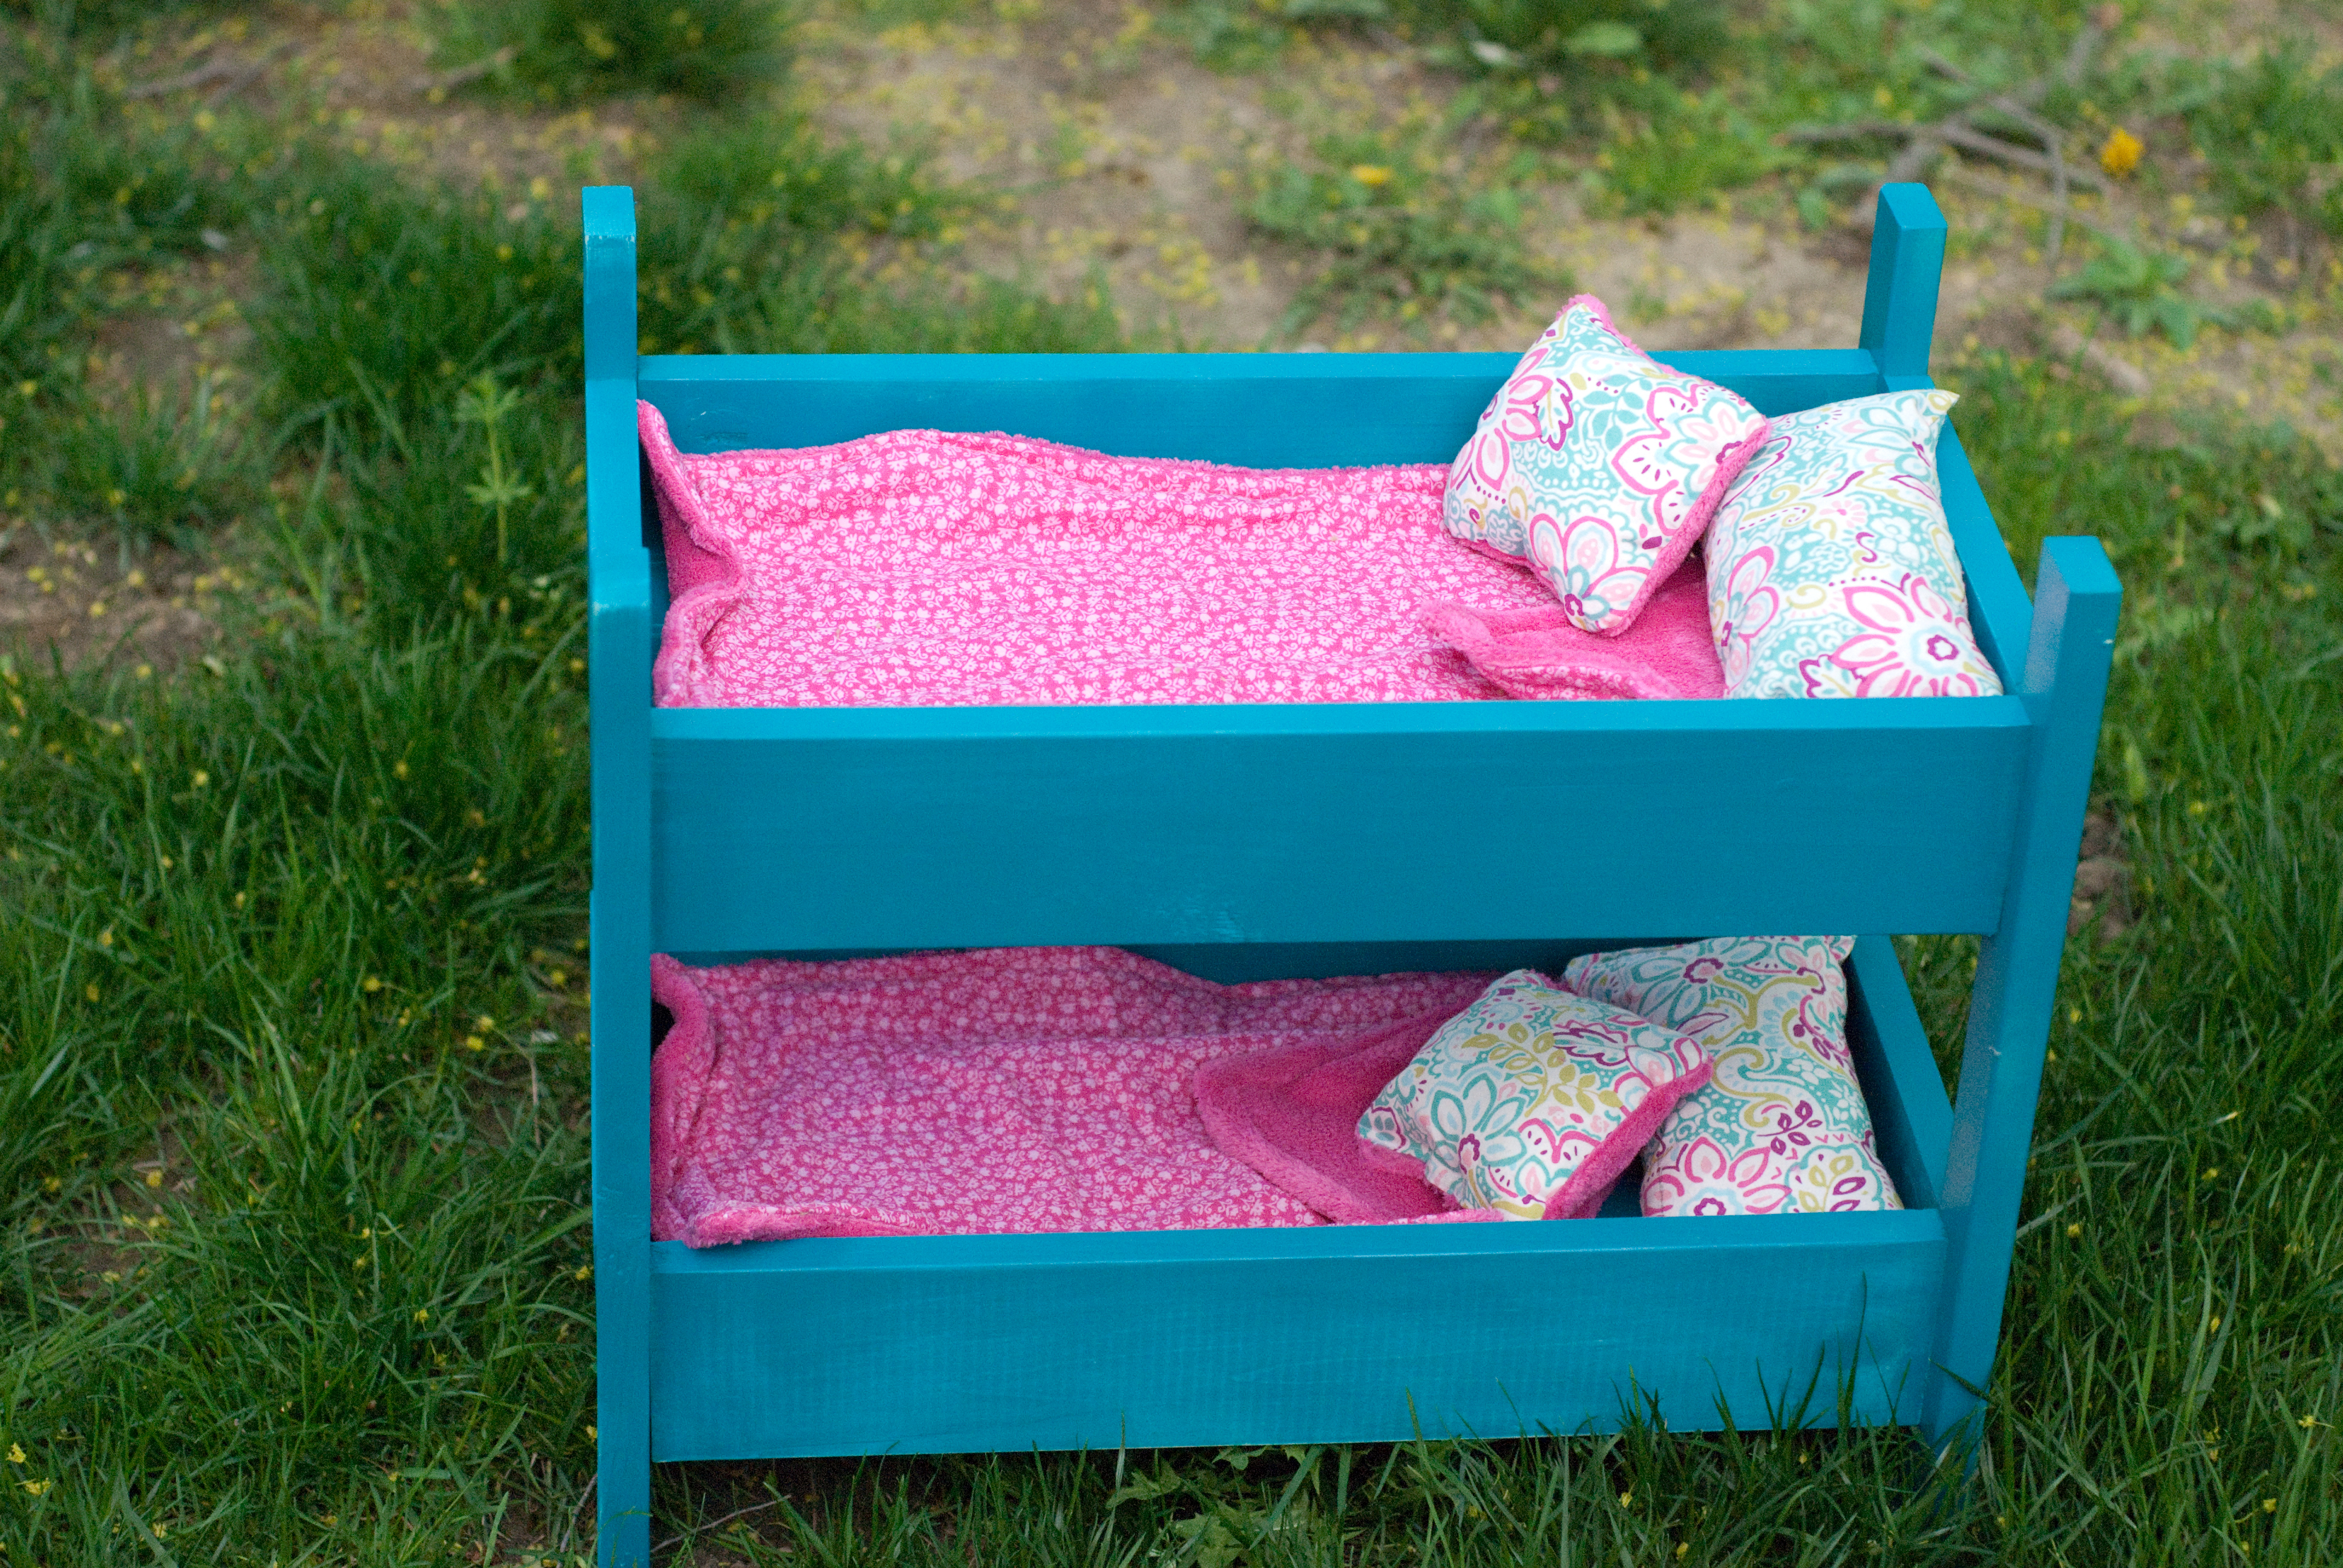
 This is it, friends. This is why you have a coop full of stanky birds that you faithfully feed, water, and save from the jowls of death to the peril of your own dignity. This is why you spend hours building them a run and letting hooligans make the biggest mess of your life painting it. This is it.
![Spring2012 012[4]](https://mylittlehouseonthehilltop.files.wordpress.com/2016/04/spring2012-0124.jpg) You may remember my last go at chickens in 2012 back in my city backyard with the awful neighbors. Mmm hmm. You may also remember that the only chickens that survived that experiment were the roosters I gave my mom (and I’m pretty sure they were eventually eaten by coyotes). Never one to learn lessons from a gruesome past, this spring I started thinking about chickens again.
You may remember my last go at chickens in 2012 back in my city backyard with the awful neighbors. Mmm hmm. You may also remember that the only chickens that survived that experiment were the roosters I gave my mom (and I’m pretty sure they were eventually eaten by coyotes). Never one to learn lessons from a gruesome past, this spring I started thinking about chickens again. This is one of those home projects that is entirely about embracing the reality of my life. It isn’t Pinterest or magazine worthy. It simply accommodates my life, in all of it’s glory (note the sarcasm). I am person that lives with two large dogs. This means dog bowls in the laundry room, dog hair in the corners, dog toys littered on the floor, and dog crates that need to be part of my living space. Big unsightly dog crates are not my favorite part of dog ownership but they are a very real and necessary part of my life.
 At my old house, I found an ikea cabinet door in the clearance section that served as a crate table to hold my house plants. It was never perfect but we got by with it.

 As I mentioned earlier, the boards did warp unevenly over the last six months and the table top is far from perfect but I’m pretty happy with how it turned out. (And yes I realize I have a houseplant problem).


 I started by taking the lamp apart because that seemed easier than taping off the metal on the top and bottom (I am so very lazy about taping). I just unscrewed the bottom and it all came apart easily.
 I painted it with two coats of homemade chalk paint. Waited for it to (mostly) dry.Traced the stencil with a pencil. Painted the leaves in white acrylic paint and the flowers in leftover latex from painting the front door. Easy peasy.


 This lamp is a perfect example.