Operation Heat the Upstairs

IMG_6136I am please to announce that on February 29, 2020, at approximately 10.30 pm, I did it!! I finished all the connections to bring heat and return air to the upstairs to the Little House on the Hill. 6.5 years after moving in, I am now heating my bedroom. In Michigan. Where we have cold winters. This feels like a big upgrade for this humble dwelling.

Last fall, I had a couple HVAC contractors out to look at three things:

  1. Bringing vents to the second floor
  2. A new AC unit (the old one died a couple years ago)
  3. Converting the furnace from propane to natural gas

The first company gave me a quote for #2, telling me that “when I install it, they would quote the vents, and that they can’t convert to natural gas.” Company #2 was far more helpful, the guy who came out does the work and knew a lot more than the estimator in Company #1. He answered several questions for me, pointed out a few things, etc. And followed up with quotes for all three things.

He said that bringing the vents to the second floor was going to cost $3,000. Gulp. And that didn’t include any of the real carpentry work or the finish work afterward – I’d still be doing that. It made the decision to run my own vents a lot easier.

The timing was important because the longest project spiral ever (living room door way, dining room, kitchen, bathroom, laundry room) was almost done but I needed to finish up trim. I realized I’d be wrapping it up just to cut open a spot in the living room to run the vents up. SIGH. I should just make the mess and then close it up.

I had to start researching everything I could about HVAC. It isn’t like installing subway tile where you can find 1000 easy to follow tutorials on how to do it. Nope, it is a murky search of threads and forums and professionals. I got a bunch of books out of the library and searched for critical info. I looked up specific questions. I read everything I could and started measuring, planning, thinking, sketching, and costing out materials.

The furnace is directly below the chimney in the living room. I knew from previous “research” (aka floor cutting up) that I could run the vent stack up beside the existing chimney and up into the kids bedroom, and from there into the attic. One straight shot up from the furnace to the attic and would just require boxing out the existing chimney a bit larger. It’s easy! Hahaha. Just like everything else, right?

My first trip to the home improvement store I spent over $400, knowing I’d be back (and I was… again and again and again). Know what is pricey?? HVAC ducting and especially the duct fittings!! Still, was it cheaper than the $3,000 quote? Yes, yes it was. It was strangely comforting having that number in my head for the month of messing around on this project. I’m saving myself thousands of dollars. Thousands of dollars. This headache is worth thousands of dollars.

Deep breath.


Another fun spin in this project was the fact that there was no return air vents on the first floor. There was one kind of hacked into the floor at the uninsulated bay window, and not realizing that’s what it was, I put a dog crate over it for several years and then closed it up entirely when I decided to insulate the floor of that bay window during the hardwood flooring install of 2019. Hmmm. Wish I had realized what was going on — but also it still didn’t work in that location so I would have had to move it then anyway.
Anyway, I needed to add return air somewhere on the first floor too.

I started by cutting the holes alongside the chimney. First in the living room – ceiling, floor, and then the kids bedroom: ceiling, floor. I cut an attic access into the upstairs attic – previously inaccessible. When I poked my head up there the first time, I was pleasantly surprised to just see insulation (though it needs more) but no random crap like I discovered in the lower attic section. Being inaccessible at least saved me that much. There was a mouse looking at me from across the small attic. Not exactly surprising but thankfully there wasn’t any evidence of an attic infestation or anything like that. He’s probably a loner mouse, crawling up into the attic for a little peace and quiet (shut up).

I’m going to spare you a lot of details because this project is not what I would call smooth sailing. Oh running the vents from the basement to the attic, pretty straightforward. But that’s where it ended. The duct fittings had to change to accommodate vent locations and the attic framing. I army crawled through the attic several times, releasing a world of insulation dust everywhere repeatedly. Duct fittings had to change to because I found a better way to do things- repeatedly. I’m not going to lie: I went to Lowes, Home Depot, and Menards a LOT during the month of February and spent a lot of money. And also had to special order a few parts. I may have cussed more in February than I have in awhile.

“These cuss words are saving me thousands of dollars…” And they did.

I tried to call in some Payback Saturday points early in the month but my mom was in the hospital and people were sick or doing taxes or doing anything but crawling through my insulation mess to help me with this. Such is real life. My cousin came by for a couple hours for her first Projects with Reenie Saturday. We patched up the subfloor in the kids room and she was with me while I cut the messy attic access. After teaching her some basics, she got the hang of the drill (woo hoo!!) and said working with me was “actually fun!” Excellent.

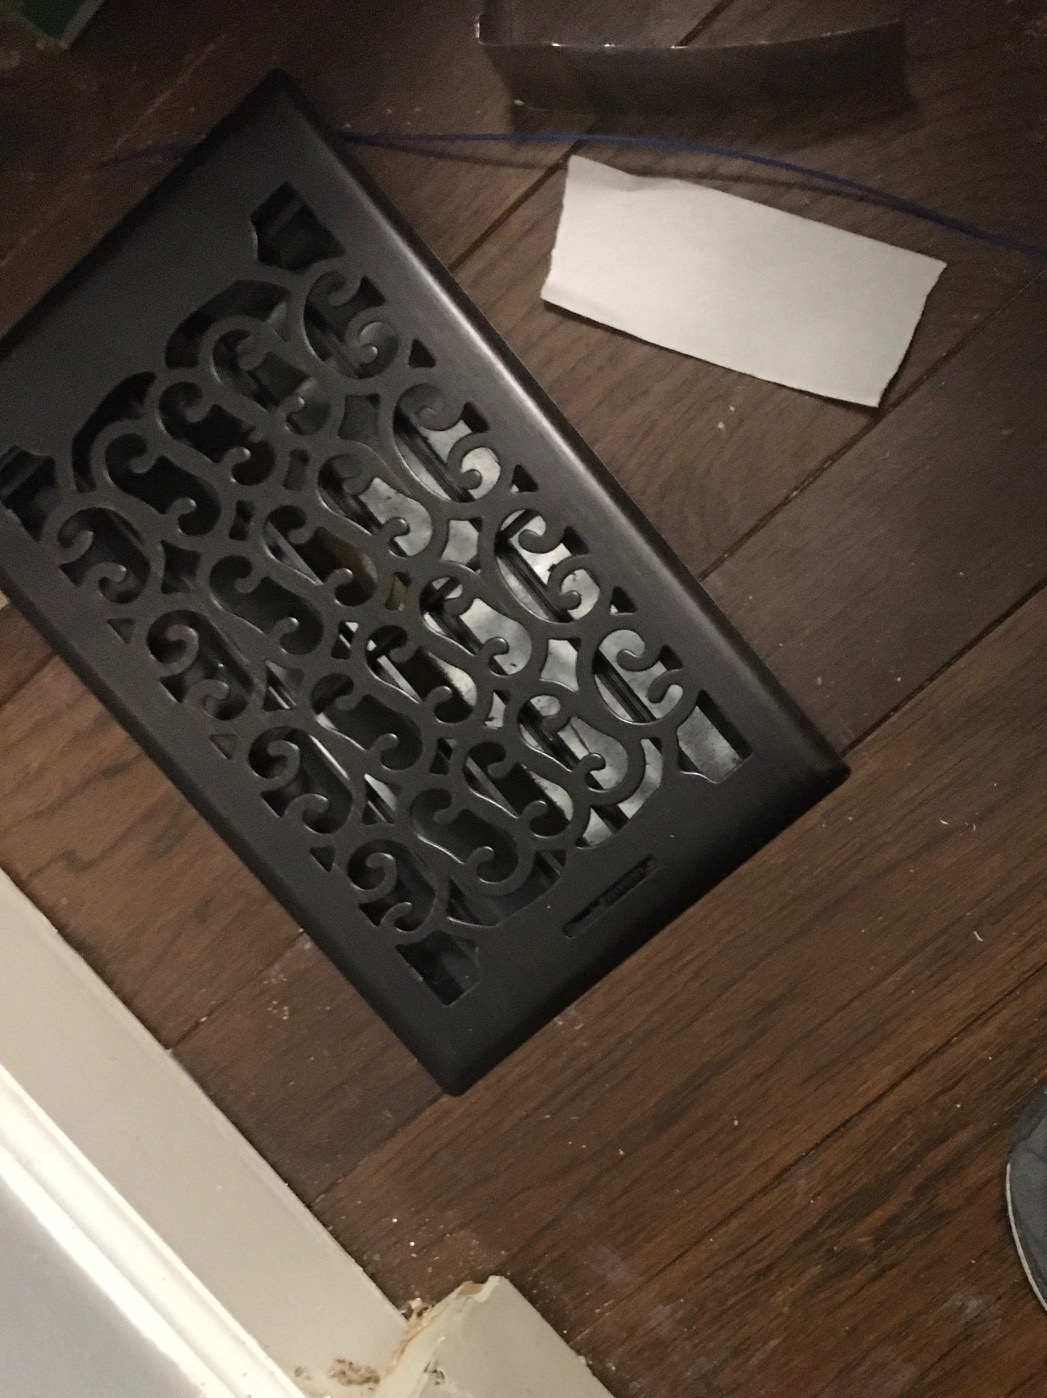
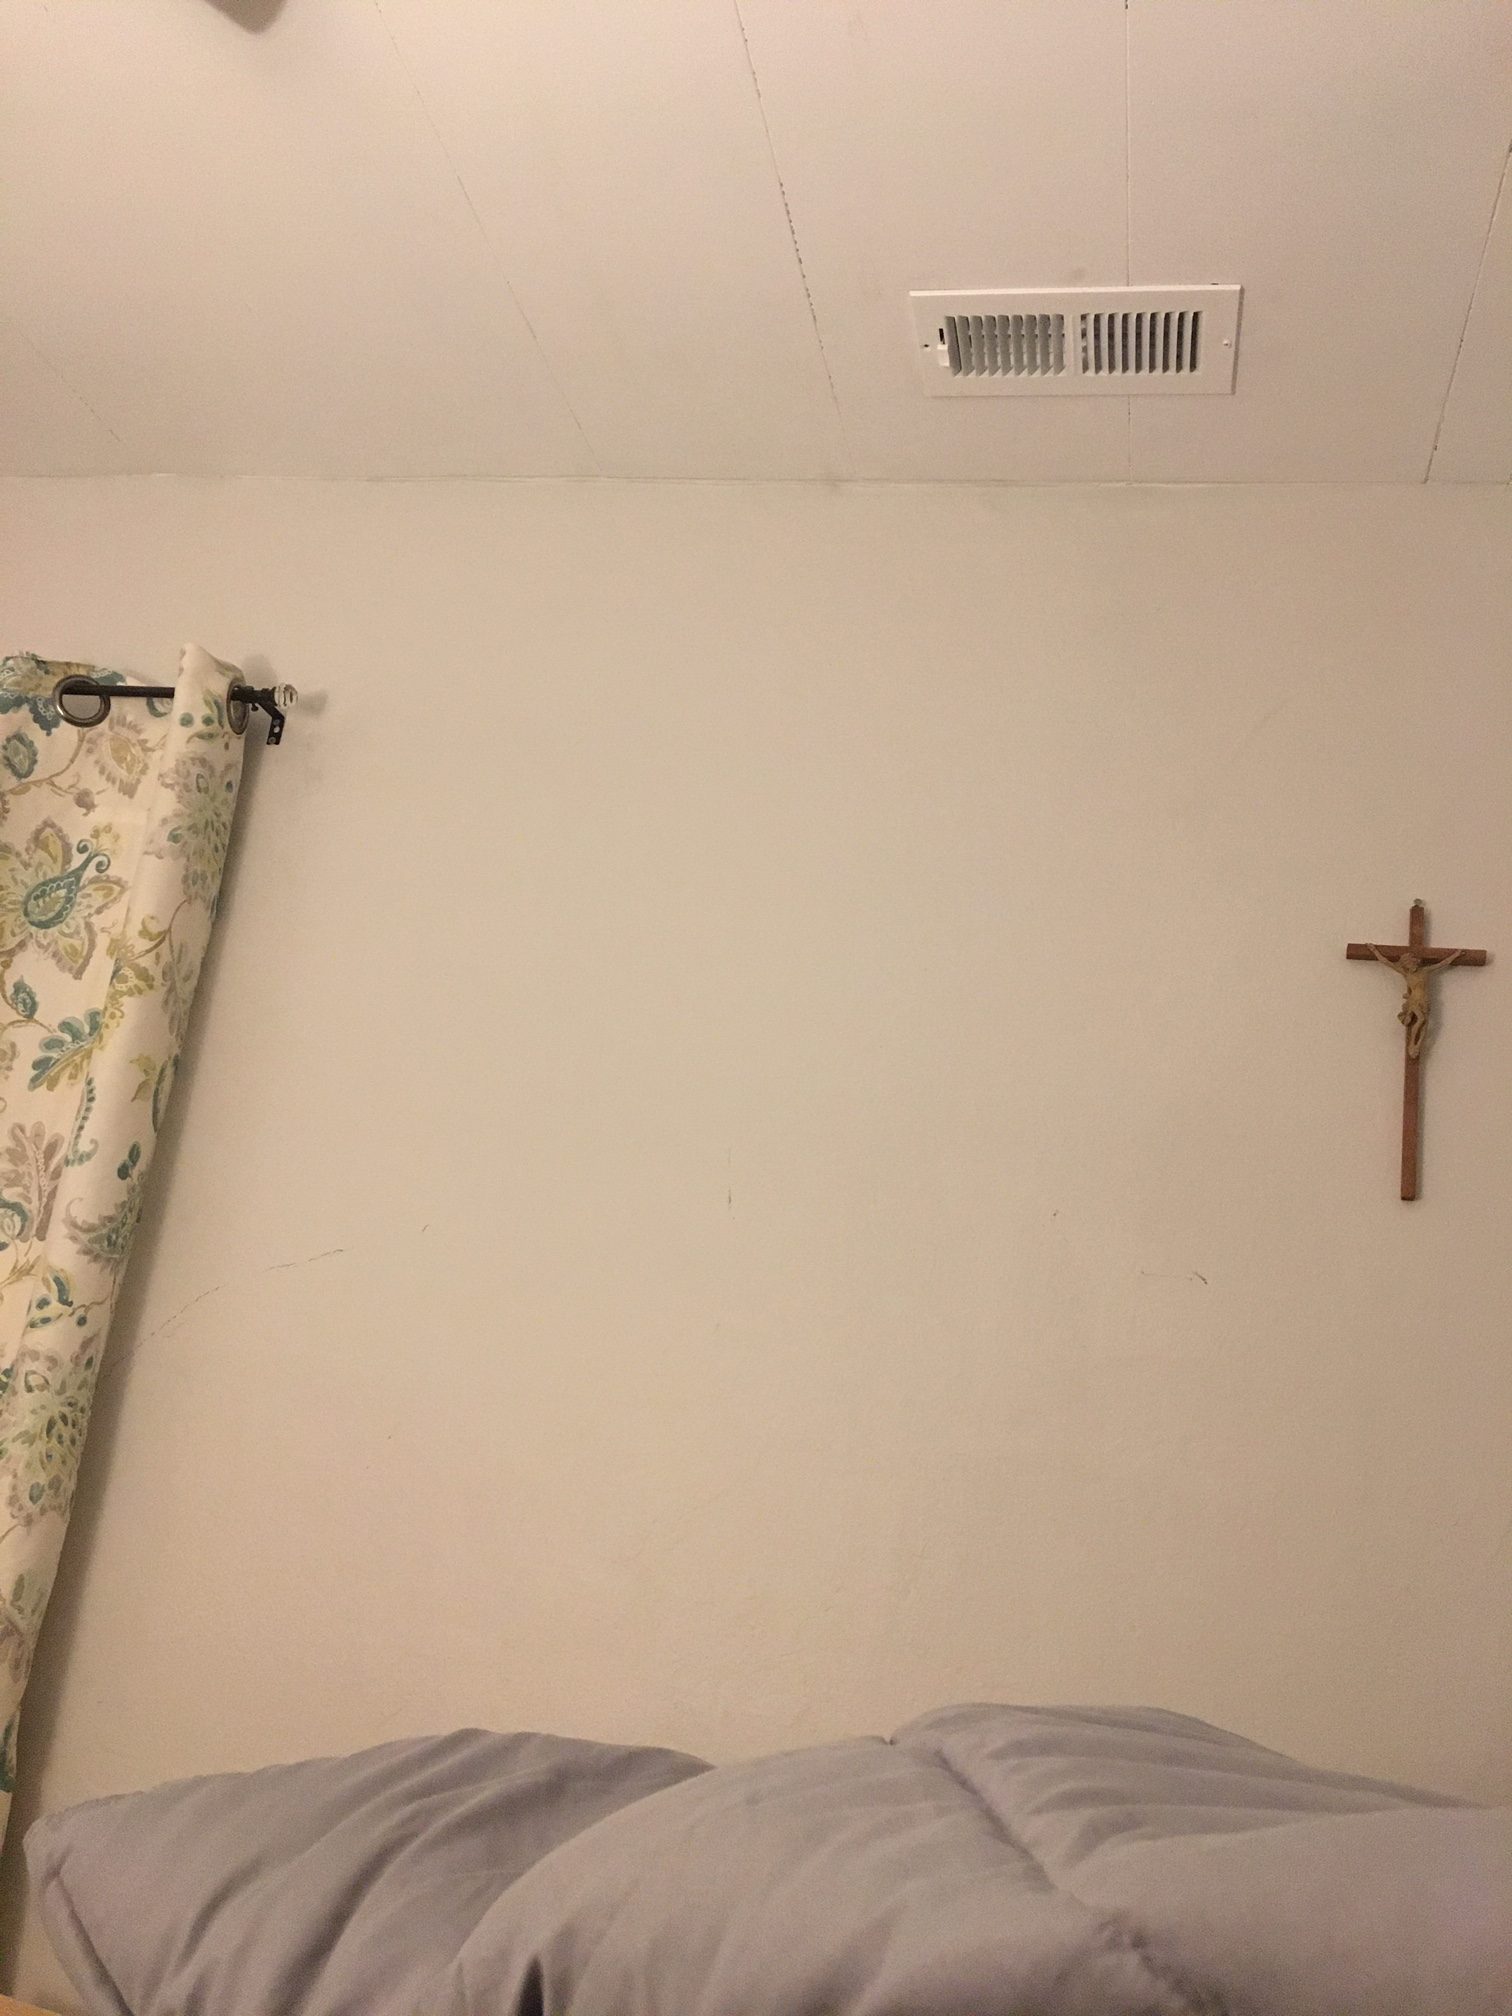
I got all the attic connections made. Holes into my ceiling for a heat vent and a return air vent. Hole in the kids’ bedroom ceiling for return air and put a duct along the stack near the floor for the heat. So the furthest run is my bedroom and that’s okay. I’m used to sleeping in the arctic so having it a few degrees cooler than the rest of the house is no great suffering and is to be expected. I can add a duct fan at a later date if it seems necessary.

Toward the end of the month, I connected the heat (hooray!!) but was still trying to sort out the return air connections. I cut a hole in the living room floor (the new, beautiful one) for the return air but couldn’t screw a box in while holding in place from below. Just not enough hands. So I admitted I really did need some help and that Saturday my brother Donal and his capable helpers (ages 3 and 5) came along with their tools and expertise (no actual expertise required).

It was the help I needed. We probably spent at least an hour of the four we had together debating solutions, standing there in a dank basement staring at vents and trunk lines to cross over, and the huge box of fitting options. We got the first floor return air box installed, and started connecting the return air vents (all in the basement at this point, just not connected to the furnace yet). He had to leave and we realized we needed two different connectors (of course). We were almost there but not quite!!! Determined to finish up, I showered and went to Lowe’s and then Home Depot (buying a few options at each store) but glad to not need to go to the further away Menards (who actually has a far better HVAC supply inventory). I went to Mass, turned down dinner plans, and went home to finish this thing. I was feeling desperate to get all the connections done!! 

IMG_6200

Naturally, when I finally got to the point of cutting the hole into the return air trunk, it kicked up so much dust I couldn’t breathe and almost couldn’t see. But I cut the hole, used straps as extra hands to hold connections in place, AND I FINISHED.

I turned the furnace back on and could immediately feel the return air pulling through. The bedrooms were warm and had return air pulling the warm air through the room.

THE HOUSE IS FINALLY FULLY HEATED!!!! 

And I lived to tell about it. IMG_6074

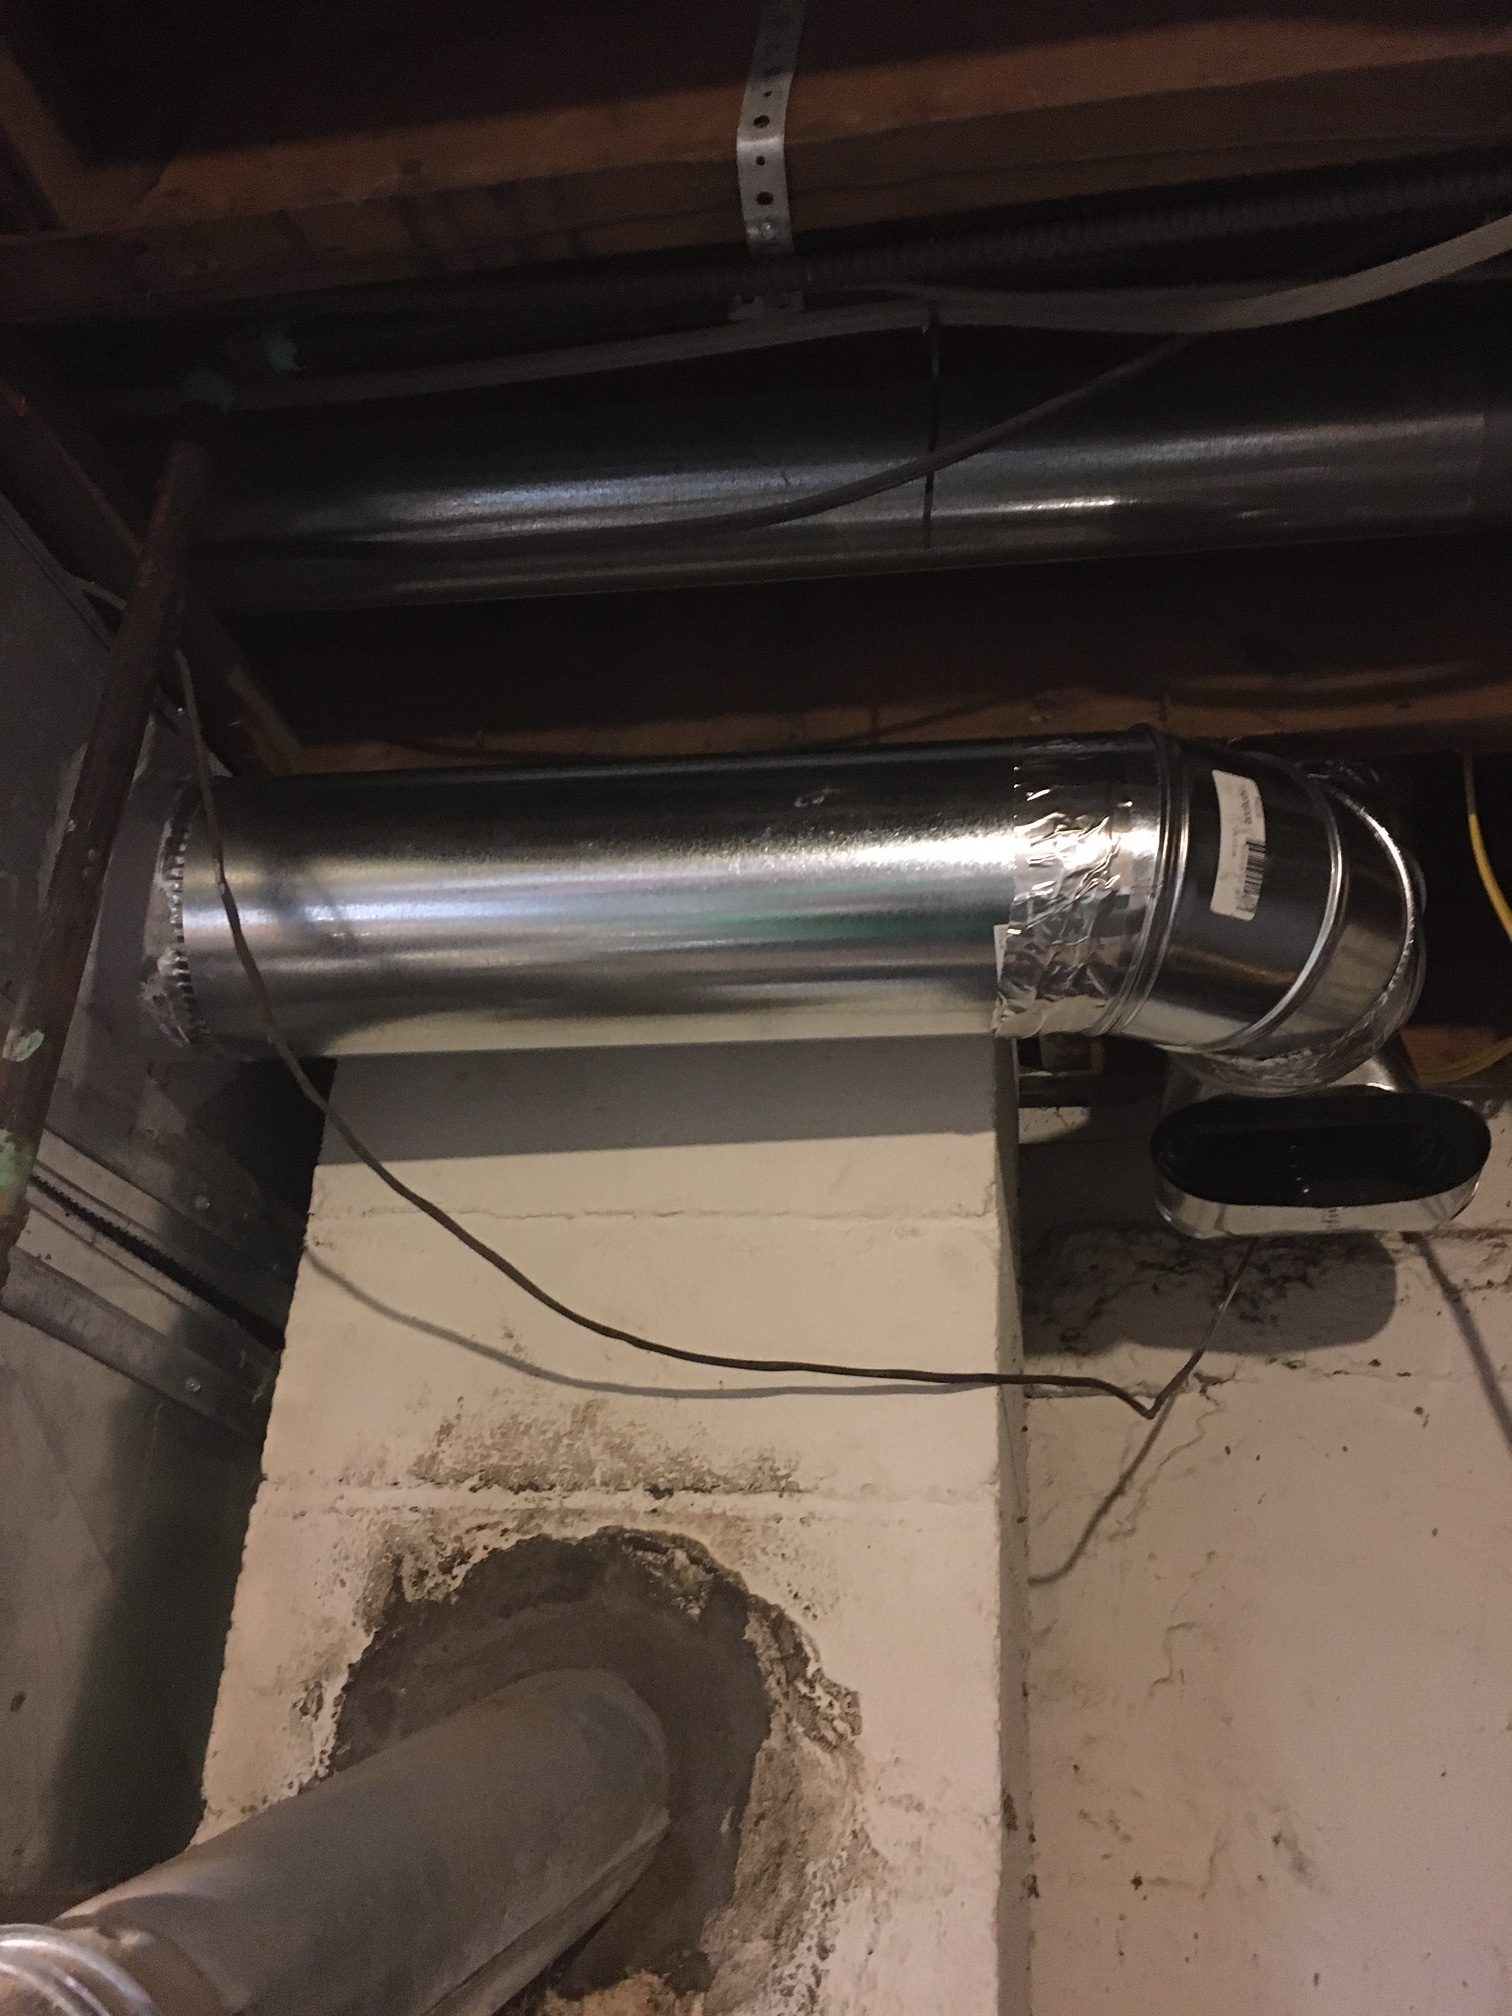
While not a cheap project, I saved thousands of dollars doing it myself. I learned a lot in the process. And I only burned through 4 hours of Paybacks. Booyah!! I also returned a massive amount of duct fittings that I didn’t need at the end. It felt great getting that money back into my account and that huge box out of my living room.

Did I mention my home is now fully heated?

Well it is. And it is great.

IMG_6115

Funny story: I keep my thermostat low at night because in the past, it was just the downstairs and the dogs live in fur coats (also I’m a miser and propane is expensive). Who needs it warmer than 55 degrees while you’re sleeping anyway? The first couple nights after the heat was running, I woke up sweating in my bed in the middle of the night. My room was a solid 53 degrees and I woke up because it was too hot to sleep. I’ve concluded I no longer need two big comforters, socks, a sweatshirt, and a heated mattress pad to sleep well. Removing a few layers has made a world of difference and getting out of the bed in the morning is 100% not as awful. 

Sliding Glass Door Replacement

It has been awhile since I posted about the Great Project Spiral of 2017. Never fear, the project is still going and still spiraling. I’m trying to get back to actually making progress and sharing some of the details…

Let me just say that the old sliding glass door wasn’t in great shape. The exterior has numerous chunks out of it. The track had parts that were broken and allowed in some cold air. And the glass itself was old and not terribly energy efficient. Mmm hmmm.

I’ve wanted to replace this door since moving in, but this is a pretty pricey replacement and this project has already gone significantly over budget. Bah. So I was trolling Craigslist earlier this summer to see if they had something to offer as a more budget-friendly alternative. Voila! For $100 and the inconvenience of driving out to the sticks, I got an Anderson sliding door, just a few years old, recently removed from this guy’s house (and yes, I can tell you exactly what he’s doing on his project, that his brother in law is flying in from Georgia to help install the new cabinets, that if I’m interested in cabinets, he’d sell me those as well…)

The door is in great shape and weighs about twice what the old one did and looks 1000% better.

Earlier in the summer, I proposed a project swap to my friend Nick, because he recently put in a sliding door at his house, and this project was kind of daunting to a newbie like me. So I watched their dog for a weekend and Nick installed the door with me helping. I clearly got the better end of this deal.

Naturally, I put it off until the weather turned cold and it gets dark really early (smooth move, Reenie, smooth move). So I snuck out of work a little early, went home and started disassembling the existing door. By the time Nick got there, it only took a few minutes to get the old door completely removed and start installing the new one.

It took us a couple hours but really impressively smooth for a project in this house (and it isn’t because everything was perfect!). I couldn’t have done it without Nick! We had to shim and level a fair amount, but by the time it was truly dark, the door was in and operational! And heavy! And beautiful!! The inside of the door is stained wood, but I’ll probably paint it all white when I do the trim.

The only truly unexpected glitch is that the door opens from the opposite side. I never even thought about that as an option. It isn’t a bad change, just a change. I’m going to be trying to open the wrong side for years to come!!

The only problem, as I discovered when I went to lock up for the night, is that the new door was missing the lock grab. It had the lock on the door part, but just this opening and no hardware for the wall side. Sigh. Naturally the next day I stopped at Lowes to find they don’t carry such a thing, just whole handle/locksets, which I don’t need. So I pondered it on Saturday for awhile and then realized “HEY! The old door has one!” Sure enough, it isn’t a perfect fit, but it does fit and I can now lock my sliding door. Woooo!

There you have it: a new used sliding glass door. Maybe the best $100 I’ve spent on this project.

Make All the Things Christmas

It was a big Make-All-theThings-Christmas over here. I went overboard which is so unlike me (said no one ever). The last couple years I’ve sewn a lot of things for the growing crowd of nieces and nephews. This year I’ve been doing more woodworking and did more along those lines for the kiddos. Although the last several weeks have been filled with panicked making of all the things – it has been good. Really good even. There’s something special about making things for your best people that you know they will love, not to mention some much needed home time and project therapy time when life is crazy. And it is certainly true that it is better to give than receive.  Here’s a round up of the projects, complete with messy before and after pictures:

Craft Carts

Two of my nieces are very creative and crafty girls. They have a little craft ghetto in their unfinished basement and I asked their dad to send me a picture of their work areas to inspire me. The craft-splosion photos made me all mushy inside, remembering the weeks my sister and I would set up our rickety folding table next to the furnace in the basement, huddled over glue guns in the dimly lit room creating Christmas magic for our friends and family. It also just made me happy they have that spot to be creative. We creative types need that. And it inspired me to make craft carts for them. I took a used kitchen cabinet, added casters, painted it, added a planked top, and a pegboard on the back so they’ve got a spot to hang all their tools. It was a stash busting project in that I could pass on some cabinets that weren’t needed for their original purpose. Ten year old me would have been thrilled and it didn’t disappoint – the girls loved them and I imagine they will be put to good use for years to come.


Magnetic Chalkboard

This one might be my favorite. I saw various tutorials and then kind of winged it. 1 x 3’s for the frame, kreg jigged pocket holes and wood glue to connect them, I stained the frame, made chalkboard paint out of clearance black paint and unsanded grout, and D ring hangers on the back. I might have to make one for myself.  (In case you try this at home, I used a sheet of metal found in the plumbing aisle – rather than the triple the price sheet metal found otherwise.)

Desk

This was a fun project. I bought this little desk a dozen years ago at a furniture sale at the school my mom attended as a kid. I went with my aunts and we all found some fun little pieces. I used this desk for several years at my old house but I don’t have a use for it at the new place. I sanded down the old crusty paint job and decided the original desktop wasn’t good enough to keep. So I made a new planked top out of 2×12’s I had in the barn. I used the kreg jig to make pocket holes to connect the two pieces and then stained it. The 2×12’s weren’t perfect but they add to the rustic charm. I painted the bottom (same chalk paint I had made for the chalkboard) and then finished it with poly.


Doll high chair

Thrift store find originally. Came looking a little rough and needing some love but I loved the pretty wood scallops and knew I could rescue it (duh). I glued and nailed a few loose joints, added a tray, and painted it. I think it came out adorable. My two year old niece loved it and reported that her baby said “I like it” and “thank you.”

Bench

I used an old twin bed head board and foot board to build a bench for two small nieces. I used deck boards from my stash to build this bench and was really happy with how it turned out. I sprayed it with my Critter sprayer using outdoor paint, home mixed for a custom blue. One of the girlies who received it was thrilled, the other informed me she doesn’t like sharing and would like me to build her a doll high chair instead. Hopefully she will enjoy it in the future. I want to make one for my house now, of course.

Water Towers

My two year old nephew is a super engineer nerd in the making. I’m so proud. On the way to a family wedding this spring I explained to him about water towers and how they create a pressurized system. That was an innocent beginning to a full blown obsession. This kid loves his water towers. He regularly watches youtube videos of water tower demolition and likes to play demolition. He was using a counter height stool the other day to demolish. Naturally, he isn’t terribly careful and he makes me nervous knocking down that big stool in close proximity to his little brother. There must be something we can make!! This was a last minute addition to #makeallthethingsChristmas but turned out so great! My sister traced water towers on some 2×6″ scraps. We cut them on my dad’s bandsaw and then my dad insisted on routing the edges (I get my whole ass tendencies from someone). Far from perfect but just the thing for this small water tower enthusiast. We painted them to match some local water towers that CK loves and had just enough time for the paint to dry before we wrapped them and headed out the door.

Youth Chair

I found this youth chair at a garage sale this summer. The prices was low and some of the joints were wobbly. I pulled the wobbly joints apart, cleaned them out, and reglued and added a few screws. Spray painted it to make it look like a whole new chair. Since his baby brother needs the high chair, this chair will certainly be put to good use immediately.

Blanket

I made my Hobbit baby nephew a blanket. Typically I try to make a blanket when a baby arrives but I was six months late on this one. I used a quilting cotton on one side and a super soft fuzzy fabric on the back. Very cozy.

Jedi Robe

There I was, doing lots of wood working type projects for a bunch of the kids, but I couldn’t figure out what to do for 7 year old Andrew. So I figured I couldn’t go wrong with a Jedi robe. I’ve made a few of these in past years for other people and they are usually a big hit. Not to mention that any kind of snuggly wearable blanket seems like a great idea, right? I was just slightly nervous he’d think he got left out of the big impressive gift bandwagon. No worries! Even too big for him, he loved it! Wore it that day for the remainder of the party and wore it back again the next day for the next party. Glad he’s enjoying it! He also discovered how much faster he can get down the slide at my parent’s house in a jedi robe. You can make it practically to the wall!

There it is! The #makeallthethingsChristmas round up. I’m glad I did it but I make no promises for how next year will look.

Rescue Chairs

IMG_1811
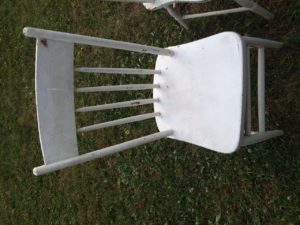
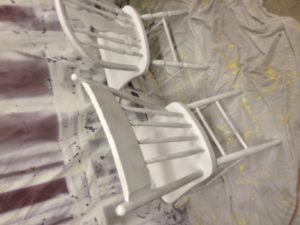
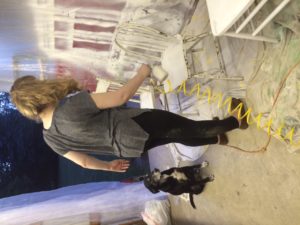
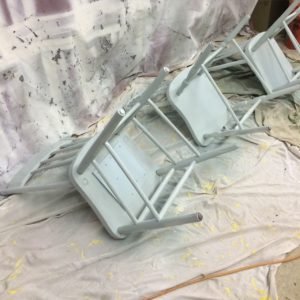
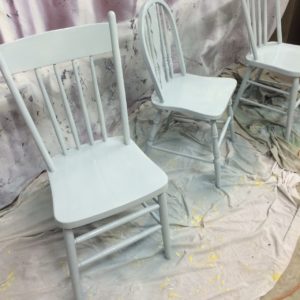
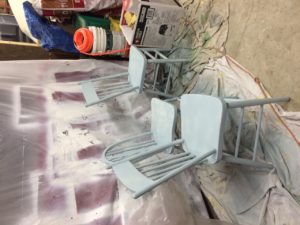
Recently one of my sister’s friends got a new apartment and found herself in need of a few chairs. Chairs you say? I can help. Not to mention this lovely young lady often takes care of my house and beasts while I’m out of town which is a lifesaver. In fact, she’ll be spending a week with my pups in a couple weeks so I can vacation with my fam. Clearly she is a person who can be trusted to give rescued chairs a good home.

Anyhow she needed three chairs for a cute little apartment that is all white and needs a dash of color. Sold! Not to mention if I get rid of my current chair stash, the chair ban could be lifted (getting rid of these three cuts my excess chair stash in half).

The original plan was for said dog sitting friend and my sister to come over and for the three of us to drink sangria and paint some chairs. Alas, life intervened and it was just my sis and I drinking sangria and painting rescue chairs. We cleaned the grime off of them. Chipped off the Great Stuff that some idiot previous owner had used to strengthen reglue make a mess of the joints. I added nails for the loose joints. Fiona gave them an overall sanding to rough the existing paint surface and we tried to smooth anything that was obviously globby old paint. I mixed up some clearance paint — of course — this particular color involved three different clearance cans. I fixed my paint barn curtains (plastic sheeting attached to the rafters of my barn), pulled out my trusty Critter sprayer and we got them primed.


I sprayed on a couple coats of the light blue custom paint (I call it Lucy Blue). Finished off with two coats of spray polyurethane for extra protection. While they don’t look brand new, they look  awesome and are rocking the shabby chic look.


Rescue Chairs before…
IMG_1672 IMG_1676 IMG_1677 IMG_1678
During…
 IMG_1683IMG_1690IMG_1689IMG_1688
IMG_1700IMG_1703IMG_1732IMG_1729
and after…
    IMG_1805
I’m so happy these are being adopted into a wonderful home where they will be loved and sat upon. You should also know that Lucy has agreed to always refer to them as her rescue chairs, because she is cool like that.


Chairs – garage sale = $9
Paint –  three cans of clearance paint at $2.50 each = 7.50 (and there’s plenty left over)
Poly – from the stash
Supplies – from the stash
Rehabbing chairs for a friend and removing them from my hoard barn – Priceless

Living Room: Front Door

My dream for the front door looks like this (style wise):
front door

Image Credit: Home Depot

That dream will be realized when I find a nice second hand door in the right size, or when I finish a lot of other projects and have a bunch of money sitting around. (But if you ever see one by the side of the road, pick it up by all means!!) Until then, the current front door is perfectly functional. Unfortunately, once I painted all the window and door trim white (actually Antique White), the front door looked terrible. It’s dingy, unpainted white simply couldn’t compete with the clean, fresh trim paint.


So I started swatching. I wanted to paint it in one of the blue shades in the curtains. I love the dark blue in the pattern best but thought it might be too dark for the door. I went with this one:


I saw an ad for the Blue Store $1 sample sale. PERFECT! I bought two (a lighter and a mid tone teal) and ended up going with the mid tone one. And I love it! Makes such a huge difference in this room! I think it was kind of the crowning glory to the whole trim painting and curtain adding project. As I stepped back to admire it, while the paint was drying, I said to myself, “Now that looks very Reenie.” And I should know.

Dog Crate Table

Image

DSC_1584This is one of those home projects that is entirely about embracing the reality of my life. It isn’t Pinterest or magazine worthy. It simply accommodates my life, in all of it’s glory (note the sarcasm). I am person that lives with two large dogs. This means dog bowls in the laundry room, dog hair in the corners, dog toys littered on the floor, and dog crates that need to be part of my living space. Big unsightly dog crates are not my favorite part of dog ownership but they are a very real and necessary part of my life.

oldhouseAt my old house, I found an ikea cabinet door in the clearance section that served as a crate table to hold my house plants. It was never perfect but we got by with it.

In this house, I have two crates that are part of my every day living and I’ve found the best way to incorporate them into my living space is to hide them so I don’t feel like I live in a kennel. So the crates are behind the couch in the living room and I put plants on top of them. It works out rather nicely because the doors open and close and there’s space on either side of the couch for the dogs to get in their beds. And best of all they are nearly invisible.

IMG_0077

Crates without table top

IMG_0055

Crates with unfinished boards laying across there

Last fall I bought the 2x10s I needed to create a dog crate table for this space and had them just laying across the crates waiting to be connected and finished. Note: Next time, go ahead and make the table when you buy the lumber. Otherwise you may get really frustrated that they did not warp evenly and make finishing the table much more complicated.

This past Saturday was gorgeous out – mid sixties and sunny. I needed a project that I could work on outside (while the puppy ran around the yard like nuts and the old dog hid under my project for protection). I dragged the boards out to the deck, got out all my tools and finally did the project.

  • Measure boards – Since the dog crates would supply the base for this table, I wanted it to overhang on the sides by at least a half inch. I cut the 2×10 boards 1.5 inches short of the overall length so I could put a 1×2 at the end for a more finished edge.
  • Connect long boards boards with kreg jig pocket holes on the back side (I put pocket holes and screws every 8 inches).  This was my first project using my kreg jig and I love it! Admittedly, I made a couple rookie mistakes but wow, I love it!
  • Nail 1×2 end boards with ryobi nailer to hide rough edge
  • Sand the whole table top down
  • Apply wood putty in the cracks (If I was going to paint this, I would have used caulk to close the seams and hide the imperfections. As it was, I would be staining it and wanted the wood putty to blend in. So I put wood putty in the seams and then sanded again once it was dry).
  • Wipe down table with tack cloth to remove all dust
  • Apply wood conditioner
  • Apply first coat of stain + poly (letting them dry completely between coats)
  • Move inside to avoid the rain
  • Sand lightly, dust with tack cloth
  • Apply second coat of stain + poly and let dry completely (I gave it 24 hours before putting anything on top of the table)
  • Hide the dog crates
  • Add plants
  • Check that one off the list!

IMG_0088 As I mentioned earlier, the boards did warp unevenly over the last six months and the table top is far from perfect but I’m pretty happy with how it turned out.  (And yes I realize I have a houseplant problem).

IMG_0089 IMG_0092


Living Room: Curtains

Two years ago I hung cheap ikea white panel curtains in the bay windows to soften it up. They were my interim curtains but not the end game. It doesn’t help that one of them got completely mangled by a certain puppy who managed to pull it inside of her crate one day.

DSC_3291


I’ve been looking everywhere since this past fall for curtains and curtain material and despairing of how expensive everything is (both fabric to sew yourself and pre-made curtains)! And also not finding the “right” thing, or at least something that spoke to me. Then I saw some curtains on sale at Kohl’s, and though they didn’t have enough in store, I was able to order them online and I really like them. The green in them matches the green TV cabinet perfectly and they brighten the space up and look lovely.

DSC_1255

Lamp #2

That first lamp, while adorable (in my humble opinion), was too short for that space. So it is going upstairs to the bedside dresser and I am still hunting for the perfect living room lamp for this side table.


Lighting in my living room has been an ongoing challenge. I put in a ceiling fan box two years ago this spring but the ceiling fan is still in it’s box in the basement waiting to be installed (perhaps this weekend?). I’ve been using these two Walmart torcheire lamps since I moved in and they are honestly just in the way. The light is nice  but the fact that the puppy and often a visiting toddler knock them over is less than ideal. I have two thrifted lamps that I bought awhile ago and I’m thinking of trading them out for the torch lamps.

That leaves the table next to the couch lamp-less and in need of some lighting. Thus my newly found obsession for upcycling lamps. I think I should start a side business for upcycled lighting called “Lamps after Dark”. Thank you, I think it is brilliant.

Sometimes we crate this adorable and energetic puppy (after attempting to wear her out):
DSC_1739

Then Suzie and I spend a bit of time pursuing our own hobbies in peace:

DSC_1753DSC_1752


DSC_1745I started by taking the lamp apart because that seemed easier than taping off the metal on the top and bottom (I am so very lazy about taping). I just unscrewed the bottom and it all came apart easily.

DSC_1751 I painted it with two coats of homemade chalk paint. Waited for it to (mostly) dry.Traced the stencil with a pencil. Painted the leaves in white acrylic paint and the flowers in leftover latex from painting the front door. Easy peasy.

Voila!


DSC_1755
DSC_1759 DSC_1762 DSC_1763 DSC_1766


The deets on this reno:
Lamp $5.99 at Goodwill
Lamp shade $6.99 at Goodwill (Naturally now that it is finished I’m not wild about the lamp shade so I’ll be scoping for a cheap replacement)
Homemade Chalk paint (I used a recipe with the baking soda because I couldn’t find my unsanded grout)
Paint Sample – Lowes (used approx 1/4 of a 99 cent sample)
Stencil (from Nu2u thrift store $0.50)IMG_0143

Creative Moments

Over the winter, I’ve had some bigger projects going on (living room trim, sewing room, staying warm, etc) and I’ve made room for some little insignificant projects. I consider these my mental health projects. They help me decompress from stress and do something creative when life is too much. I will say that a couple dollars and a bit of creativity goes a long way toward saving my sanity sometimes.
DSC_1555DSC_1557 DSC_1572
DSC_1578This lamp is a perfect example.
Purchased for 2.50 at thrift store (half off)
Painted with a couple coats of MMS milk paint in Luckett’s green with bonding agent (from my stash).
Stenciled the leaves on (stencil was a thrift store find $0.50) with MMS milk paint in Grain Sack.
Sanded to distress a few spots
Finished with Valspar chalk paint sealing wax
Lamp shade from Meijer $10
I got a cute lamp out of the deal for about $14 (if you factor in everything) and spent an hour doing something theraputically creative. Clearly a win. It looks a little short for the table I planned to use it on, so I’m going to use it in the bedroom where I need a bedside table. And it means I can scour the thrift stores for another Ugly Duckling to make over.
 DSC_1577

Crazy goes on vacation

Because Crazy never sleeps, there I was, in a familiar cabin, surround by familiar way out of date decor, and I notice the lamp. Sheesh. Half the cabins still have this lamp, bolted to the table. This one is, you may notice, is mustard colored and the mustard paint is all chipping off. Lovely. I’m sitting there staring at it and can’t help but think the marvels a well aimed can of spray paint could do. Hmmm. Really? We can’t just leave well enough alone?
IMG_7709 IMG_7711
No. We cannot. It just so happened I needed thread to finish the baby quilt I was trying to finish up there (because yes, I sew on vacation, shutty). I couldn’t do it without the gray thread. So Lu and I went on an early morning adventure to Joann’s for the thread with a stop at Walmart for a few other things and a $4 can of spray paint.
I am that crazy.
IMG_7712
IMG_7714And I don’t regret it at all. Voila! Look how much better it looks!


IMG_7715Yes, I want to now spray the remaining collection of paint peeling mustard lamps up there. And now I’m going to scope out the thrift stores for some better lamp shades because eww.
You can’t stop Crazy, even on vacation.

#Ihaveaproblem #DIYdisease #makingtheworldprettieronelampatatimeIMG_7716